Chapter 1:
The Ups and Downs
I built a motocross bike with a Tomos Sprint frame as the base coupled with various Puch parts. The inspiration came one day when I stumbled upon a European maxicross build by
#therealribens and his crew
#ejowpuchacademy, and
#banana. They used a Puch Maxi frame as their base and converted into a motocross bike that they took off road and raced around a dirt track. Their bikes looked super cool and looked super fun to ride.
I initially set out to build this bike for my sons and niece to tear around on her uncle's farm. It supposed to be a cheap build using all the left over parts I had. But as you will see, it turned out to be anything but cheap. #mopedluau build to the scope creep degree.
The build story begin with a rusty barn find at my cousins house:
 |
| Barnyard Tomos Sprint rusting in the rain at my cousins house for over 10 years. |
 |
| Reach the Moped Luau garage only because the television show Hawaii Five-O wanted to use it as a prop in one of their episodes. Made a hundred bucks for a days shoot for that rust bucket. |
 |
| I even had to rig up a uni strut shock so it could even roll prior to its TV time. |
 |
| Sat in the rain at my house for an additional 4 years before I decided to do something with it. At one point I was going to give it away or throw it away. |
 |
| Stripped it and got rid of most of the Tomos parts. |
 |
| Bought some generic KTM pit bike seat and plastic panels from Ebay. |
 |
| Went to town on hacking the rear fender off and various tabs that was no longer needed. |
 |
| Mocked up the seat and new plastic fender to just where I wanted it. |
 |
| Fabbed up some metal scrap pieces I had for the frame work. |
 |
| Cut and grind until I got it to a level of "good enough". |
 |
| Good enough. |
 |
| Laid down some welds. Can't take all the credit for the weld up. My buddy Josh (#i_be_alaka_i) cleaned up my mess. |
 |
| Heavy duty butt framing. |
 |
| Good Enough |
 |
| Fit up all the plastic panels and magnum fork. Shout out to John #inspireoahu for the freebie fork. |
 |
| John also hooked me up with a Puch engine mount. I decided to go with Puch Powa since I was most familiar with the engine and I had more parts for it lying around. |
 |
| Cut off the Tomos mounts and tacked up the Puch mounts. |
 |
| Getting there. |
 |
| Mock up with fork and plastic panels. Cut off the forks light brackets in the process. |
 |
| I might have sat on it at this point and busted one of the tacks. |
 |
| Josh helped me with the final welds for the engine mount and swing arm mount. I reused the Tomos swing arm mount. |
 |
| Josh also reinforced the engine mount by welding in some filler braces. Gave it a mean solid look. |
 |
| Now it was time to tackle the swing arm. I used 2x3 box steel. In hind site, I could of gone with something smaller like 1x2. These 2x3s were heavy. I ordered them on Amazon! Yup Amazon free shipping to your door. |
 |
| Cross brace fit up. |
 |
| Drilled the holes and tacked up for fit up. |
 |
| Side profile |
 |
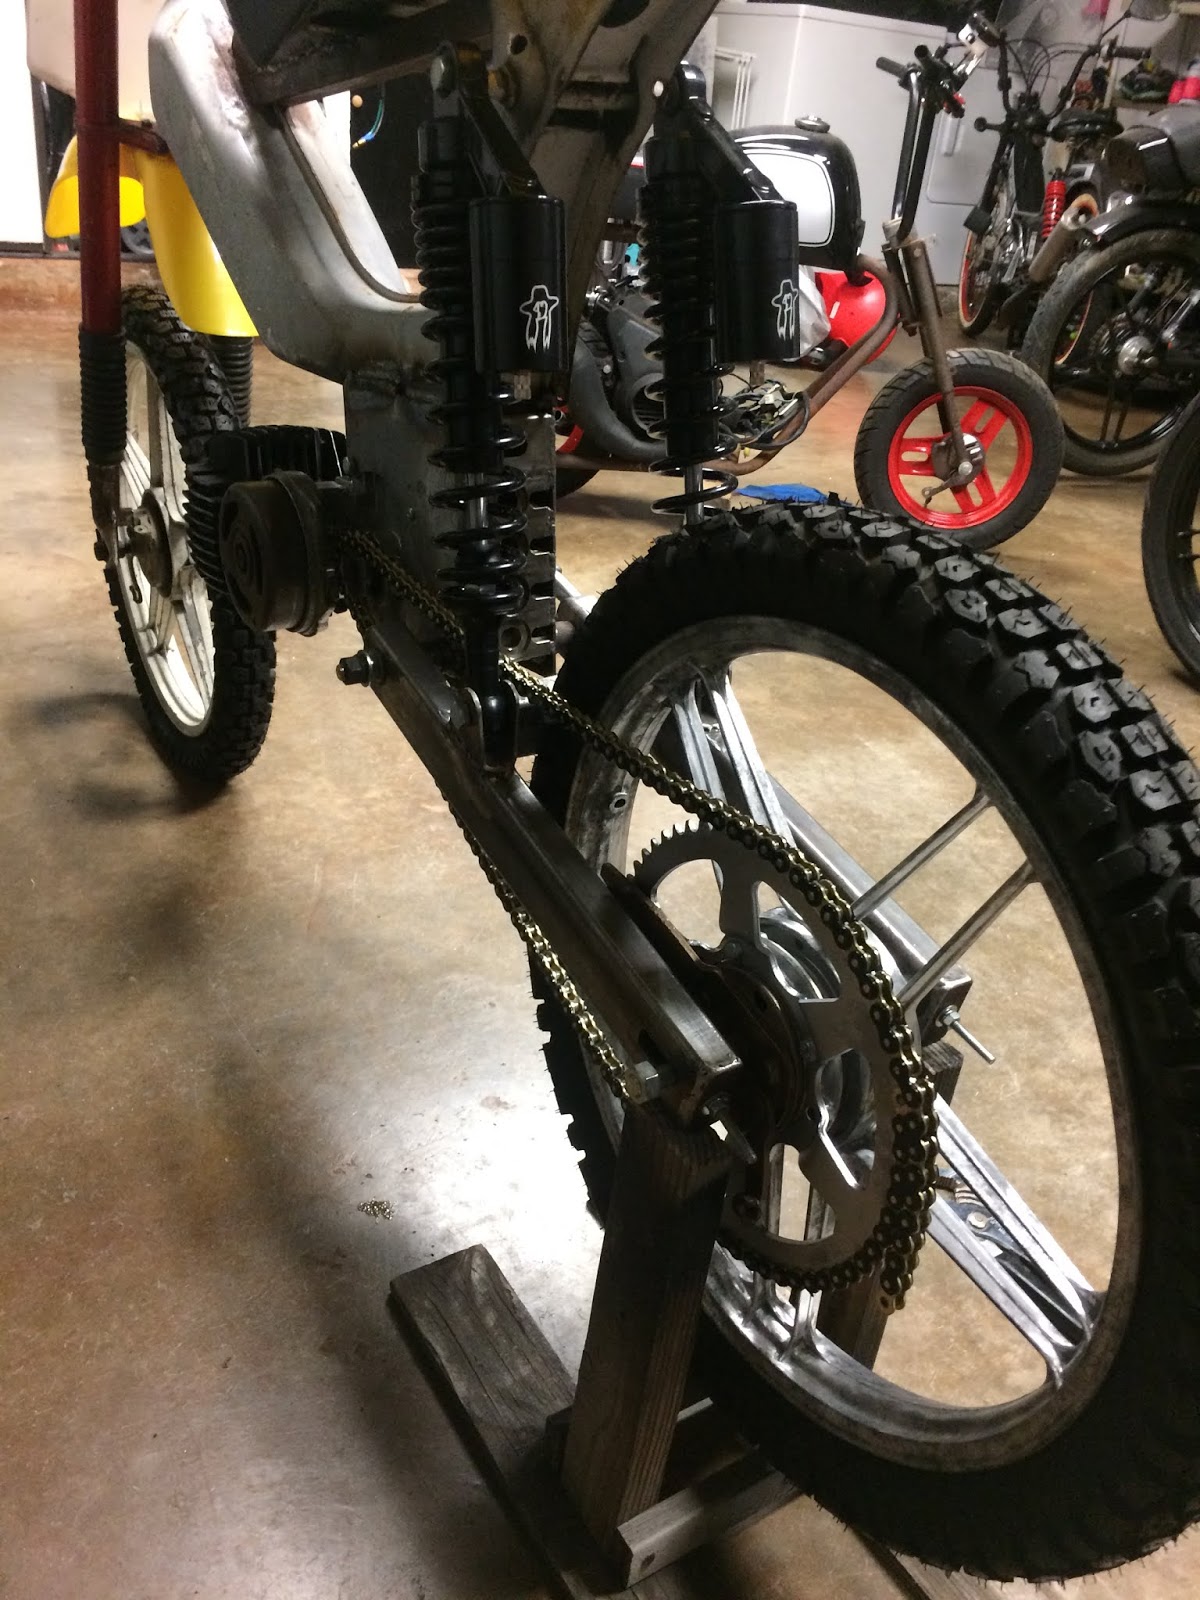
| Welded end plates for the chain tension-er. Full mock up with gear and shock. Gear and shock bought from #treatland. |
 |
| Mock up with both shocks. Used the leftover box steel as the bottom shock mounts on the swing arm. |
 |
| I think I sat on it again at this point. |
 |
| Looking good. |
 |
| Mock up with handle bar. |
 |
| Project status check. |
 |
| Now it was time for the motor. I decided to use my kickstart E50 I had lying around. I was going to build this motocross bike's power plant similar to a Puch Magnum X pit bike. I also had the Magnum bore with L-ring too. |
 |
| First: Tear down. I had this sitting in the garage for years. |
 |
| Karate Kick!! |
 |
| Clutch. |
 |
| Photo for record for reassemble. |
 |
| Clutch. |
 |
| Bell. Record photo. |
 |
| Disassembled. Time to clean. |
 |
| Light cleaning with engine degreaser was in order. |
 |
| Time to mod the clutch. |
 |
| Initial clutch shoe weight. |
 |
| Shaved off over 10g per shoe with just drilling holes. Didn't want to go too crazy with any cuts. |
 |
| Reassembled clutch. |
 |
| Kickstart springs with 1.5 turns out from flush. |
 |
| Magnum bore. Old school port work still holding up. Didn't have to do anything to it. |
 |
| Back in the day, these ports were going at least +55mph. |
 |
| Ports done back then without Dremels!! |
 |
| Use of pure ingenuity to make you go fast. |
 |
| 50cc is all you needed. |
 |
| This was hand filed down back in the day. |
 |
| And the trusty 50cc L-Ring piston. |
 |
| Transfer matched the case. |
 |
| Didn't want to go crazy just in case I had other plans for this kickstart motor in the future. |
 |
| Fit up complete. |
 |
| Cases clean inside.... |
 |
| ....and out. |
 |
| Had my sandblaster open so I gave the combustion chamber a brush blast to help with fuel atomization. |
 |
| Changed out the bearings and seals. |
 |
| Fits like a glove. |
 |
| Time to marry the halves together. |
 |
| Transmission assembly begin. |
 |
| Clutch in. |
 |
| Plate in. |
 |
| Kickstart cover on. |
 |
| Added some fuel boost ports. Don't ask me why. |
 |
| Wrinkle finished the cylinder and head. |
 |
| Scraped the fins for a nice look. |
 |
| Side view. |
 |
| Mounted the tires (without tubes...long story) onto the bike. This is the first time as a rolling chassis. Sat on it and was surprisingly nice and springy. |
 |
| Starting to look like a motocross bike. |
 |
| Motor mounted. |
 |
| Chain fit up. Was holding my breath that it cleared. |
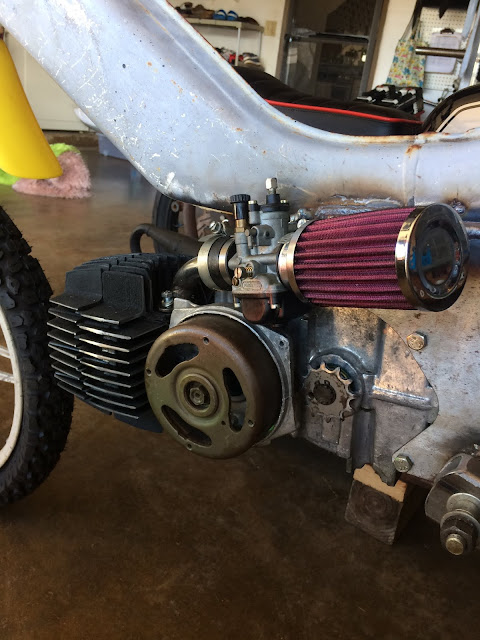 |
| Used a 21mm Dellorto carb I had lying around. |
 |
| Gutted Magnum pipe. |
 |
| Final fit up with reversed bracket. |
 |
| Mounted the pegs. Used the Tomos mounts and welded extension pieces to each end. But I found out quickly that the kickstarter would hit the pegs no matter where I tried fitting them up. I figured this final location gave the kickstarter enough travel to start the motor. Will shall see if this decision pays off.... |
 |
| Other side no problem. |
 |
| Top view of the pegs. |
 |
| Kickstand mounted. Had to do a lot of bending to make it clear the swing arms and chain. |
 |
| Coil and fuel valve on. |
 |
| Fuel line and cables on. |
 |
| Ready for its first start!! |
STOOOOOPPPPPP!!!! ONE STEP FORWARD... TWO GIANT STEPS BACK!!!! EPIC FAILURE on my part. First, off the kickstarter didn't have enough throw to turn the motor over. So I had to crank it with a power drill. After a whole day of trying to start it, i scratched the motor portion of the project. It was either an air leak in the case, too big of a carb, or the magnum bore and piston was damaged. Either way, I reached my wits end after a days worth of trying. I decided to scrap the motor and go a different direction. This is when the scope creep started. I figured I had the 21mm Dellorto carb. Why not bring the cylinder size up to the carb instead of buying a smaller carb and going down to the 50cc Magnum bore. Yeah makes total sense. Right? In other words, JUST SLAP A KIT ON IT!!
Check out Chapter 2 of this build on how it turned out.


No comments:
Post a Comment
Please comment